
Perfect if you have a big garden or run a restaurant/hotel/school with a garden
Overview:
A bokashi compost stack can be used to process large quantities of:
- brown organic waste such as dry leaves, shredded coconut husk, rice husk
- fresh green garden waste such as green leaves from pruning
- fermented kitchen waste and organic waste from wet markets
This method is extremely fast and requires little space, which is why we have adopted it as our main approach to large-scale composting.
It combines the best of aerobic and aerobic composting – an unusual combination which is made possible by the use of EM (Effective Microorganisms) and fermented food waste using the bokashi method.
A bokashi compost stack can be made underground (in a deep pit) or over ground (as shown here, in various forms of frames). Both underground and overground work well, although during monsoon the deep beds tend to get waterlogged.
We usually use the above-ground version shown here if we plan to harvest the compost for use in the garden. The below-ground pit is our preferred option when we want to prepare the ground for intensive growing or to plant fruit trees. Either way, the method is basically the same.
Method:
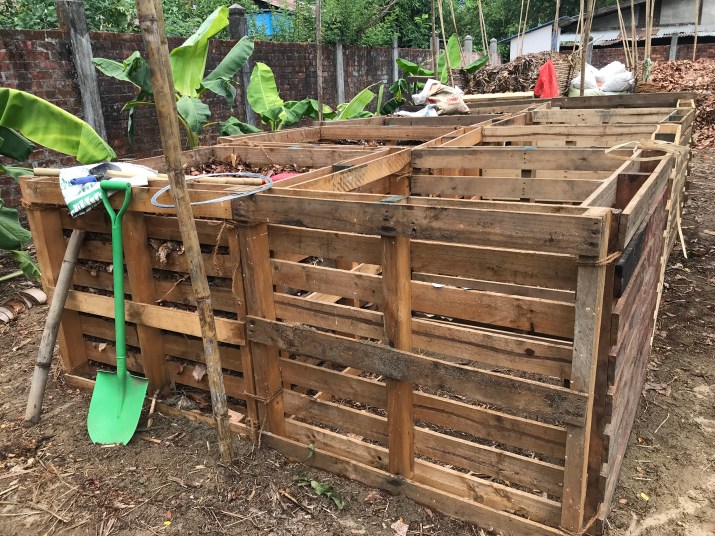
- BUILD A STRUCTURE, SHADED IF POSSIBLE
You can use bamboo, shipping pallets (plastic or timber) or any other building material you have available. Make it as sturdy as possible. You will need to be able to fill it easily and empty it easily, so detachable end walls are a good idea.
We build our stacks using shipping pallets tied together with rope. Each one is approximately 1 cubic metre in size and they can be connected in groups.
We fill them one stack at a time.
2. MAKE A WATERPROOF AND REMOVABLE COVER
The bokashi stack should maintain an even humidity and be as cool as possible. During monsoon it should be protected from rain, so a removable cover is good. This can also be used to shade the stack during the dry season. Another alternative is to erect a bamboo grid over the stack in the dry season and grow gourds to shade the compost. The gourds can be planted directly in the compost.
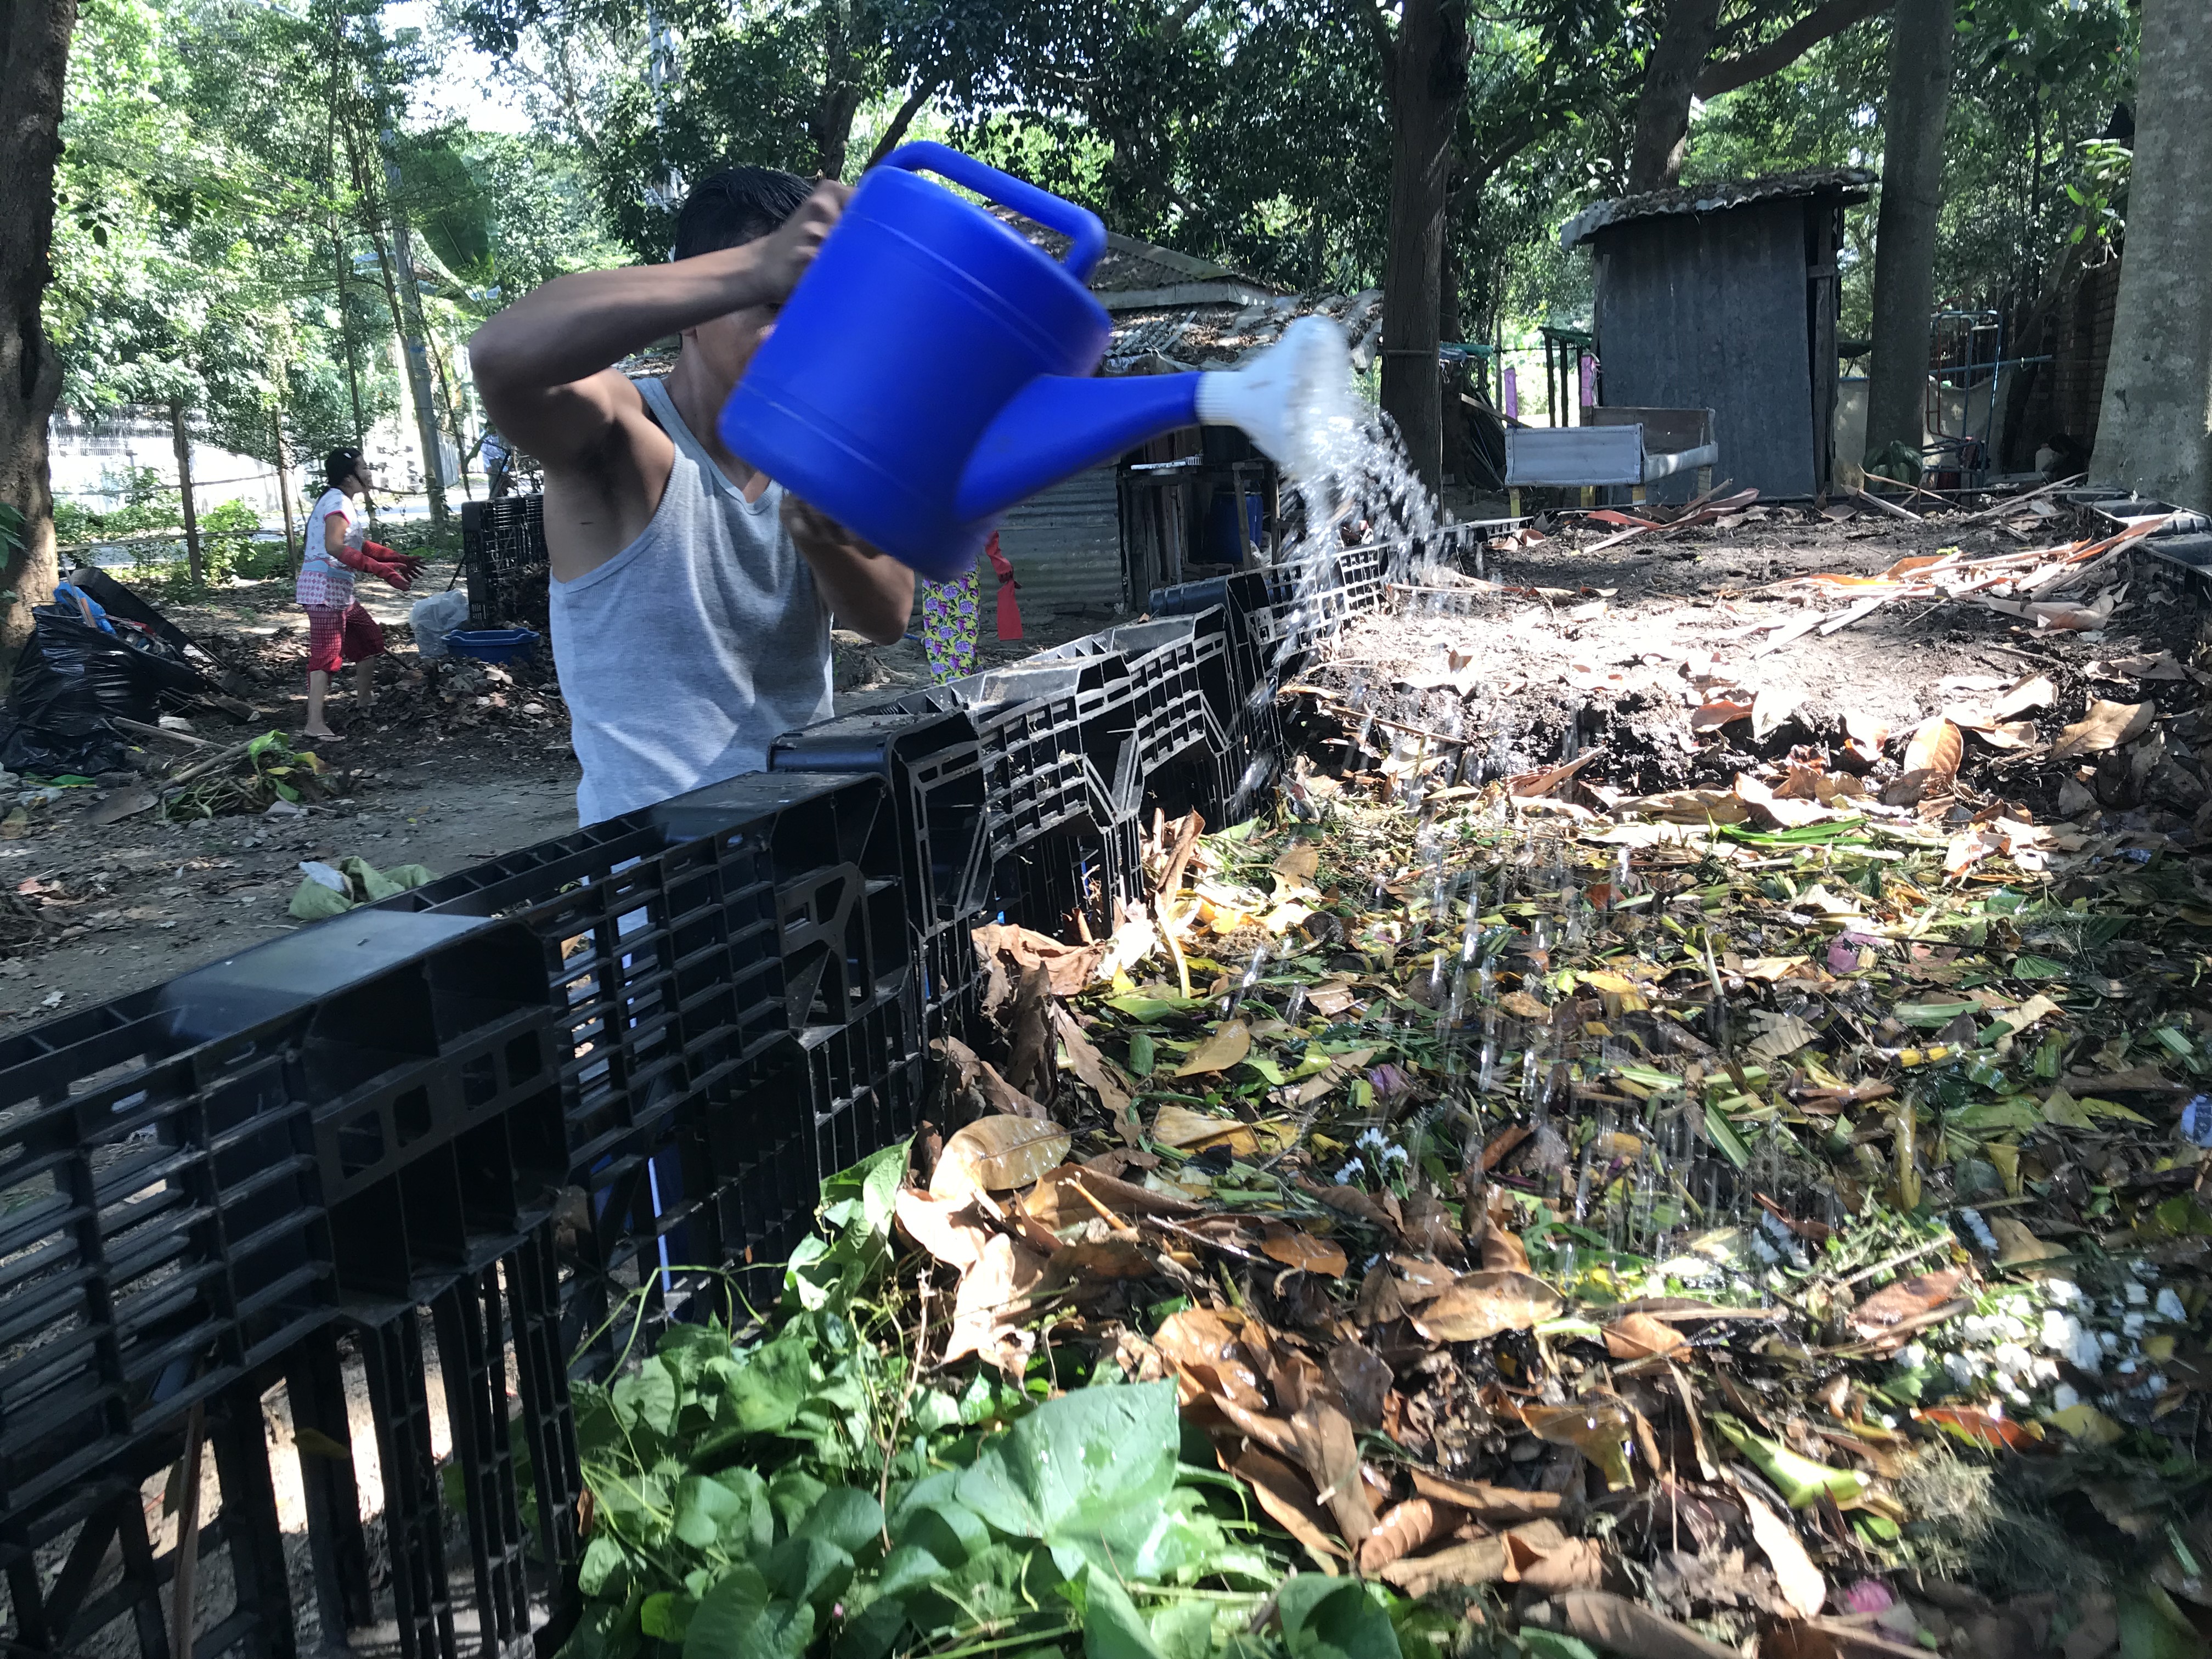
3. START FILLING THE STACK

In the section you plan to fill, build up the stack layer by layer as follows:
ROUGH LAYER
- put a layer of rough garden waste in the bottom. Branches, coconut husks etc, all cut to 30-40 cm lengths. These will take time to compost but can remain there for as long as needed.
- water this layer with CEM, 2 watering cans per square meter (see below)
BROWN LAYER
- put a layer of brown garden waste, dry leaves etc.
- walk on it to make it as compact as possible
- water this brown layer with CEM, 2 watering cans per square meter (see below)
GREEN LAYER
- put a layer of green garden waste, grass cuttings, green leaves and hedge cuttings. The smaller the better.
- walk on it to make it as compact as possible
- water this layer with CEM, 2 watering cans per square meter (see below)
- fermented kitchen waste can also be added as a “green” layer (no need to walk on it)

SOIL LAYER
- put a layer of garden soil, sand, or cow manure
- walk on it to make it as compact as possible
- water this layer with CEM, 2 watering cans per square meter (see below)
BROWN LAYER
- repeat as before
GREEN LAYER
- repeat as before
SOIL LAYER
- repeat as before
NOTES:
- aim for a moisture level in the stack that is similar to good soil. Not too wet, not too dry!
- water the stack as needed to maintain the moisture level, or protect from rain in the wet season
- the stack can be built in a single day, or built up over time. Whatever is practical
- top the stack with a soil layer
- each layer should be 5-10 cm when compacted
- aim for a relatively even balance between green and brown layers
HARVEST
- your compost will be ready to use after 4 to 6 weeks in tropical heat, assuming you have used the method described here. The initial compost will be relatively rough, ideal for use as a mulch. For a finer compost, wait longer and sieve the compost as needed through a net.
- a compost with fermented bokashi food waste will have more nutrients than a compost based only on green and brown waste. However you do it though, the compost will be an excellent soil improver — adding structure, nutrients and soil carbon. You can’t go wrong!


MAKING CEM
CEM is the liquid, activated version of Effective Microorganisms. It essentially contains the same microbes as you have in bokashi bran and fermented bokashi food waste, but in an easy to apply form.
You can make CEM yourself, very cost-effectively, using EM-1 (which is the original concentrate product, available from Bokashi Myanmar) and high-quality molasses.
CEM is used to water a bokashi compost stack as well as generally in the garden to improve the soil and plant microbiomes. The standard dilution is 1:100, i.e. 1 deciliter in a 10 liter watering can.
METHOD:
To make 20 liters of CEM you will need:
- 20 liter water bottle, preferably with tap. It must be airtight.
- 18 liters of clean water (purified is best, but good tap water is also fine)
- 1 liter EM-1 Effective Microorganisms from EMRO Japan (available from Bokashi Myanmar)
- 1 liter quality molasses (also available from Bokashi Myanmar if needed)
METHOD:
- Take 9 liters of water.
Add 1 liter molasses and stir to mix (so the molasses does not sink)
2. Pour into 20 liter bottle
3. Add 1 liter EM-1
4. Top up with 9 liters water
5. Wait for 1-2 weeks for it to ferment
6. Use within 6 months, preferably sooner


